1. vsocde좌측 github연결을 위해 'source-control 아이콘'을 클릭합니다.

2. 'Clone Repository'를 클릭합니다.

3. 로그인(Sign In)여부를 물어보는 메세지박스가 뜨면 'Allow'를 클릭하여 로그인창을 띄웁니다.

4. gitHub접속성공후 해당계정의 모든 URI List를 오픈할건지 물어보면 'Open'을 클릭합니다.

5. 상단 중앙에 URI List가 펼쳐집니다.

6. List중 하나를 선택하면 'Clone Repository'를 오픈할것인지 물어봅니다. ' Open'클릭

7. 로컬PC해당경로에 파일을 넣어도 되는지? 다시한번 물어봅니다. 'Yes I trust this authors'를 클릭합니다.

8. 해당 프로젝트가 java프로젝트이면 자동으로 우측아래 'java 확장팩' 설치를 하도록 메세지창이 뜹니다. 'Install'클릭

9. 자동으로 설치를 진행합니다.

10. 'java확장팩'설치가 끝나면 'jdk'설치하라는 메세지가 보여집니다. '클릭'하면 jdk버전선택창이 뜹니다.
호환성(현재일기준 젠킨스가 17에서 설치되며, 최신spring-boot도 17이상에서 구동됩니다.)이좋은 '17'을 선택하겠습니다.

11. jdk설치경로는 본강의에서 지정한 모든개발환경을 모아서 관리하기위한 경로(C:\A_teammoca_repository)로 설치되도록 경로를 변경해줍니다.

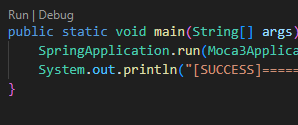
12. 'main'함수를 가지고있는 '*Application.java'를 오픈합니다. 우측상단'▷' 또는 main함수위 'Run' 버튼을 클릭하여
Spring-boot application을 실행합니다.
13. JDK에서 방화벽오픈을 허용해줍니다.

14. 에러없이 Application이 started되었는지 확인합니다.

15. 브라우저에서 'localhost:8080'을 실행하여 최종테스트를 마칩니다.

'IT개발' 카테고리의 다른 글
| AWS 무료회원가입하기 (0) | 2023.08.08 |
|---|---|
| node.js를 이용하여 react설치하기 (0) | 2023.08.06 |
| Array정복 in javascript (0) | 2023.07.31 |
| github를 사용하는 git 기본사용법 eclipse사용 spring-boot 예제사용 (0) | 2023.07.20 |
| vscode(VisualStudioCode)에 gitHub연동하여 repository생성하기 (0) | 2023.07.15 |


