1. Dynamic Web Project 생성
Project - New -Dynamic Web Project

2.WebContent와 동등한 경로에 \websquare_home 디렉토리 복사 붙여넣기

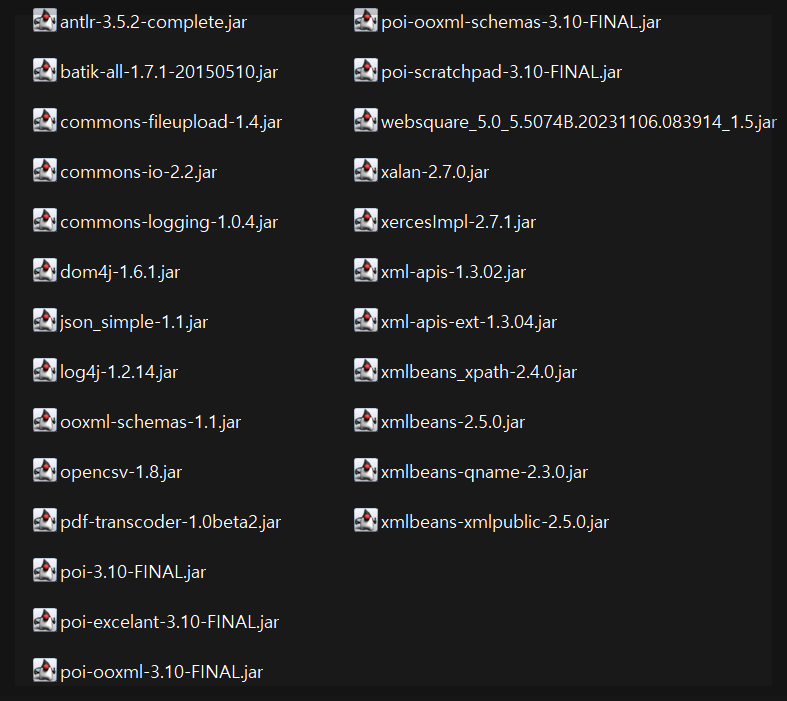
3. 웹스퀘어 엔진파일 속 WebContent/WEB-INF/lib 디렉토리 속 jar파일 모두 복사 붙여넣기

4. WebContent/WEB-INF/web.xml 세팅
websquare servlet설정을 추가합니다.
<servlet>
     <servlet-name>websquareDispatcher</servlet-name>
     <servlet-class>websquare.http.DefaultRequestDispatcher</servlet-class>
</servlet>
<servlet-mapping>
     <servlet-name>websquareDispatcher</servlet-name>
     <url-pattern>*.wq</url-pattern>
</servlet-mapping>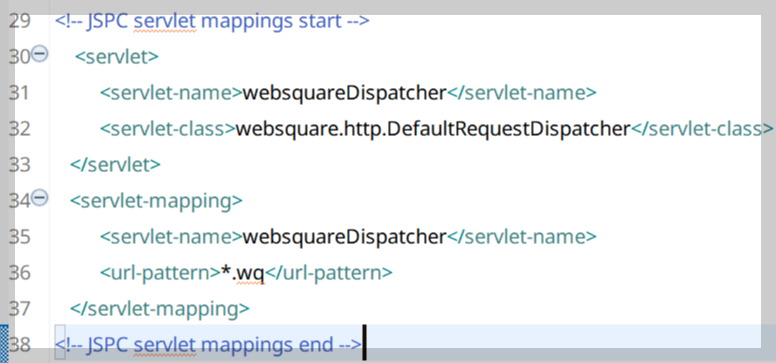
5. \WebContent\websquare(정적리소스 파일)붙여넣기
기존 웹스퀘어 엔진에 있던 websquare폴더를 통째로 가져와 붙여넣습니다.

6. test.xml생성 (Context Root 설정)
제일 처음 웹스퀘어 파일을 열 때 Context Root를 설정하게 됩니다.
이때 경로는 WebContent디렉토리로 잡아주시면 됩니다.

7. Tomcat서버로 확인해보기
1) tomcat서버 생성 및 websquare home VM설정


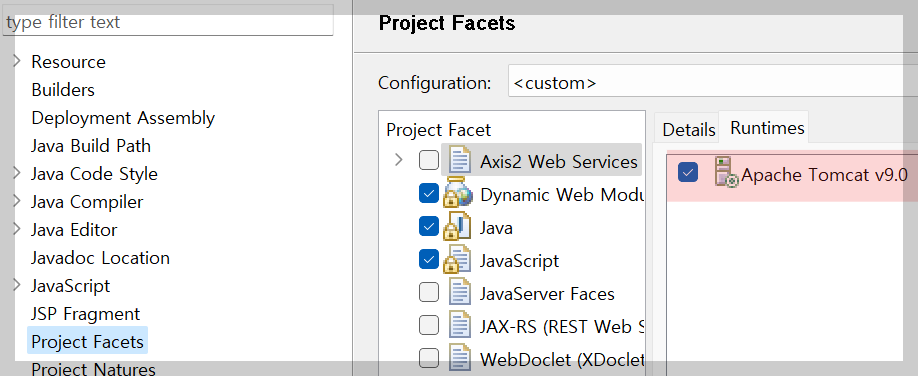
2) Project Facets - Runtimes - tomcat 체크
그러고 나서는 프로젝트 - Properties - Project Facets에 들어가서 Runtimes탭에 있는 tomcat서버를 체크합니다.
3) Tomcat실행
작업이 완료되었다면 tomcat을 실행시켜서 접속해보도록 하겠습니다.
저희는 port 8080 을 이용해서 접속해보겠습니다.
웹스퀘어 접속url은 /websquare/websquare.html로 접속합니다.
파일경로는 websquare.html 또는 websquare.jsp 뒤에 ?w2xPath=[경로] 를 덧붙여 접속하실 수 있습니다.
예시) http://localhost:8080/websquare/websquare.html?w2xPath=/ui/test.xml

8. SpringBoot 프레임워크에 적용해보기
springBoot프레임워크에 websquare프로젝트를 적용해보겠습니다.
*여기서 주의할점은 servlet설정을 하는데 여기서 사용되는 servlet이 어떤 버전인지 꼭 확인하시고 작업을 해야합니다. ( javax.servlet을 쓰느냐, jakarta.servlet을 쓰느냐 확인!)
실제로 저희가 작업하는 웹스퀘어 환경은 javax를 지원하는 환경이므로 SpringBoot 2.7.8 버전 프레임워크를 적용했습니다.
SpringBoot3.x 이상을 사용하시면 jakartaWebSquare를 설치해야 합니다.
1) SpringBoot 프로젝트 pacakge
설치방법은 두가지입니다. 각자 상황에 맞게
SpringBoot2.7.8 maven pom.xml로 설치
또는 pom.xml을 package하여 나온 .jar파일들을 lib디렉토리에 넣고 시작해도 됩니다.

2) \newTest\WebContent\WEB-INF\lib 폴더에 모든 SpringBoot관련 .jar파일 넣기
\newTest\WebContent\WEB-INF\lib 디렉토리에 모든 SpringBoot관련 .jar파일들을 넣어줍니다.

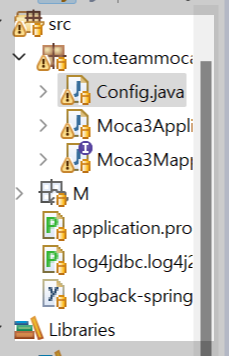
3) SpringBoot 기본환경
SpringBoot의 기본구성은 아래와 같으며 Config.java에서 websquare servlet을 등록하고 websquare home을 설정하는 과정을 보여드리겠습니다. (아래의 SpringBoot 관련 설명은 SpringBoot 편에서 상세히 다루도록 하겠습니다.)
| 파일명 | 역할 |
| Moca3Application.class | 서비스호출하는 controller 및 springboot 실행 |
| mapper.xml | sql쿼리 xml |
| Config.java | Config파일 |
| Moca3Mapper.java | sql (mapper.xml) 과 controller연결해주는 인터페이스 |
4) webSquare servlet설정 (웹스퀘어 home설정)
@Bean
public ServletRegistrationBean<javax.servlet.Servlet> websquareDispatcher() {
      ServletRegistrationBean<javax.servlet.Servlet> reg = new ServletRegistrationBean<javax.servlet.Servlet>();
      reg.setServlet(new websquare.http.DefaultRequestDispatcher());
      reg.addUrlMappings("*.wq");
      reg.addInitParameter("WEBSQUARE_HOME","//websquare_home경로");
      return reg;
}
5) 실행
설정이 완료되었다면 Java Application을 실행시킵니다.
서버가 정상적으로 떴다면 url에 접속하여 화면이 정상적으로 뜨는지 확인하실 수 있습니다.
예시) http://localhost:8080/websquare/websquare.html?w2xPath=/ui/test.xml


WebSquare Home설정 및 WebSquare환경 세팅에 대한 방법이 궁금하시다면 아래 포스팅에 자세하게 적어두었
https://teammoca.tistory.com/43
[웹스퀘어] 웹스퀘어 환경세팅
안녕하세요 오늘은 웹스퀘어 환경세팅에 대한 설명을 포스팅 해보도록 하겠습니다. 1. WebSquare home세팅 웹스퀘어 home세팅하는 방법엔 여러가지가 있는데 대표적인 예시 3가지를 설명해보도록 하
teammoca.tistory.com
'IT개발' 카테고리의 다른 글
| AWS EC2 새로운계정으로 이동(복사)하기 (0) | 2024.11.21 |
|---|---|
| [ERR] Errors running builder 'Java Builder' on project '프로젝트명'. (1) | 2023.11.24 |
| [WebSquare5] 웹스퀘어 프로젝트 구조 및 기본세팅 (0) | 2023.11.23 |
| [Ubuntu] mariaDB설치 및 외부접속하기 (Ubuntu 22.04) (0) | 2023.11.20 |
| [React] 서버에 수정된 파일 배포할 경우 주의사항 (1) | 2023.11.17 |


